Building OpenStreetMap tiles
As part of my long-standing interest in all things offline and remote, I’ve been toying for a while with the idea of generating my own OpenStreetMap tiles so I can take an offline map with me on adventures.
While all the data and tools to do this are freely available, for a long time the process has sadly been far from straightforward.
Tilemaker changes all that.
Tilemaker is a convenient self-contained tool that generates vector tilesets directly from OSM PBF files, without requiring a database or any of the helpers and ceremony associated with many of the raster tools.
Let’s build and serve a simple default map of the UK.
Generating tiles
-
Install tilemaker, either from source or via
yay -S tilemakeron Arch. There also appears to be a nix package. There is a Debian package available in testing (Bookworm), but not yet stable (Bullseye.) -
Make a working directory, which I'll call
map, along with a couple of sub-directories:$ mkdir map && cd map $ mkdir coastline tilesets -
Download https://osmdata.openstreetmap.de/download/water-polygons-split-4326.zip into the coastline directory and extract its contents:
$ cd coastline
$ curl -LO 'https://osmdata.openstreetmap.de/download/water-polygons-split-4326.zip'
$ unzip water-polygons-split-4326.zip
$ mv water-polygons-split-4326/w* .
$ cd ..
This is not strictly required but it allows tilemaker to generate sea tiles, which definitely improves the UK map.
-
Grab
config-openmaptiles.jsonandprocess-openmaptiles.luafrom here, and save them in the working directory asconfig.jsonandprocess.lua. -
Download an OSM planet extract. For the sake of experimentation I chose to just build maps for the UK so that the inevitable rebuilds due to learning and (later) tweaking configs would be less painful.
Grab the
.osm.pbffile for the country of your choice from Geofabrik -
Your working directory should now look like this:
. ├── coastline │ ├── water_polygons.cpg │ ├── water_polygons.dbf │ ├── water_polygons.prj │ ├── water_polygons.shp │ ├── water_polygons.shx │ ├── water-polygons-split-4326 │ │ └── README.txt │ └── water-polygons-split-4326.zip ├── config.json ├── great-britain-latest.osm.pbf ├── process.lua └── tilesets -
Finally, build your tiles:
$ tilemaker --input great-britain-latest.osm.pbf --output tilesets/gb.mbtilesOn my machine this took around 4 minutes 35 seconds, and generated a 1.3GiB
gb.mbtilesfile from a 1.5GiB PBF.
Serving tiles
Now we have some tiles, let’s put together a simple viewer so we can admire them. Viewing the tiles requires a) a tile server; b) a map display library; and c) a little HTML to tie everything together.
We’ll use mbtileserver to serve the tiles. Assuming you have the Go toolchain installed, you can install mbtileserver with:
$ go install github.com/consbio/mbtileserver@latest
By default this will leave you with a binary in $HOME/go/bin. From the maps
working directory you can just run this with no arguments as
$ $HOME/go/bin/mbtileserver
It will automatically serve everything it finds in tilesets.
Viewing tiles
Finally we can put together a simple front-end. We’ll use MapLibre as the mapping library, and Caddy to serve our resources.
-
Still in the
mapsworking directory we made above,$ mkdir -p srv/www/resources/fonts $ cd srv -
Make a new Caddyfile:
:8888 { root www # Reverse proxy everything under /services to mbtileserver on # its default port handle /services/* { reverse_proxy http://localhost:8000 } # Serve everything else as a static file handle { file_server } } -
Add an index file at
srv/www/index.html:<!DOCTYPE html> <html> <head> <script src='https://unpkg.com/maplibre-gl@latest/dist/maplibre-gl.js'></script> <link href='https://unpkg.com/maplibre-gl@latest/dist/maplibre-gl.css' rel='stylesheet' /> <style> body { margin: 0; padding: 0; } #map { position: absolute; top: 0; bottom: 0; width: 100%; } </style> </head> <body> <div id='map' style='width: 800px; height: 600px;'></div> <script> var map = new maplibregl.Map({ container: 'map', style: 'style.json', // stylesheet location center: [-1.1398,52.6369], // starting position [lng, lat] zoom: 9 // starting zoom }); map.addControl(new maplibregl.FullscreenControl()); </script> </body> </html> -
The
style.jsonfile referenced in the script section above tells MapLibre where to find its tiles and how to render them. I “borrowed” the one used on the tilemaker example website here; all you need to do is updatesources.openmaptiles.urlandglyphsto point to your local spec file and fonts (see next steps):{ "sources": { "openmaptiles": { "type": "vector", "url": "/spec.json" } }, "sprite": "https://openmaptiles.github.io/osm-bright-gl-style/sprite", "glyphs": "/resources/fonts/{fontstack}/{range}.pbf", }You can see my full version at: https://paste.sr.ht/~clarkema/aa991766ee5109b3127edec697fd419d645cb258.
-
The spec file (
srv/www/spec.json) defines a tile source. Update the template URL to point to your local server. Thegbin the URL below comes from the name of thegb.mbtilesfile we generated with tilemaker; if we'd been generating a map of Iceland withtilemaker [...] --output tilesets/iceland.mbtilesthen the URL would behttp://localhost:8888/services/iceland/tiles/{z}/{x}/{y}.pbf{ "tilejson": "2.1.0", "name": "tilemaker_default", "attribution": "", "description": "Tiles made with Tilemaker", "version": "1.0.0", "scheme": "xyz", "tiles": [ "http://localhost:8888/services/gb/tiles/{z}/{x}/{y}.pbf" ], "minzoom": 0, "maxzoom": 14, "bounds": [ -180, -85.05112877980659, 180, 85.0511287798066 ], "center": [ -1.247,51.761,10 ] } -
The final resources we need are some fonts. These are available from https://github.com/klokantech/klokantech-gl-fonts; just clone the repository and drop all the directories into your
resources/fontsdirectory. -
Your working directory should now look like this (lots of
*.pbffiles elided under the font directories):. ├── coastline │ ├── water_polygons.cpg │ ├── water_polygons.dbf │ ├── water_polygons.prj │ ├── water_polygons.shp │ ├── water_polygons.shx │ ├── water-polygons-split-4326 │ │ └── README.txt │ └── water-polygons-split-4326.zip ├── config.json ├── great-britain-latest.osm.pbf ├── process.lua ├── srv │ ├── Caddyfile │ └── www │ ├── index.html │ ├── resources │ │ └── fonts │ │ ├── KlokanTech Noto Sans Bold │ │ ├── KlokanTech Noto Sans CJK Bold │ │ ├── KlokanTech Noto Sans CJK Regular │ │ ├── KlokanTech Noto Sans Italic │ │ └── KlokanTech Noto Sans Regular │ ├── spec.json │ └── style.json └── tilesets └── gb.mbtiles -
Fire up your server with
caddy runand visit http://localhost:8888/
The final result
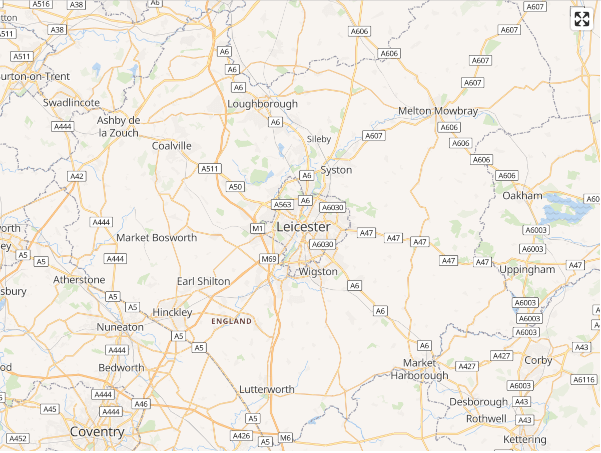
There’s a lot more to be done before this is a truly self-contained offline mapping system with all the features I’d eventually like—the proof-of-concept presented here needs tidying, packaging, all the JS and other external resources need to be vendored, etc... then there’s routing and geocoding to explore and I’m sure an endless rabbit-hole of map styling to fall down.
Still, I’m really pleased with this as a start! The people behind Tilemaker have done an amazing job at making these kinds of results accessible to those who aren’t well-versed in OpenStreetMap arcana.